Oersted's experiment
A current carrying conductor produces a magnetic field around it.
Magnetic field patterns
Process:
In order to plot magnetic field lines around a straight current-carrying wire with a compass, thread a wire through a small hole in a sheet of cardboard. The wire should be perpendicular to the cardboard sheet. Connect the wire to a battery so that there is a current flowing through the wire. Take a compass to put on a cardboard sheet. Mark the position of the ends of the compass needle.
Results:
- The magnetic field plot obtained consisted of concentric circles
- The circles nearer the wire were closer to one another (更密集). This implies that the magnetic field was stronger at regions nearer the wire
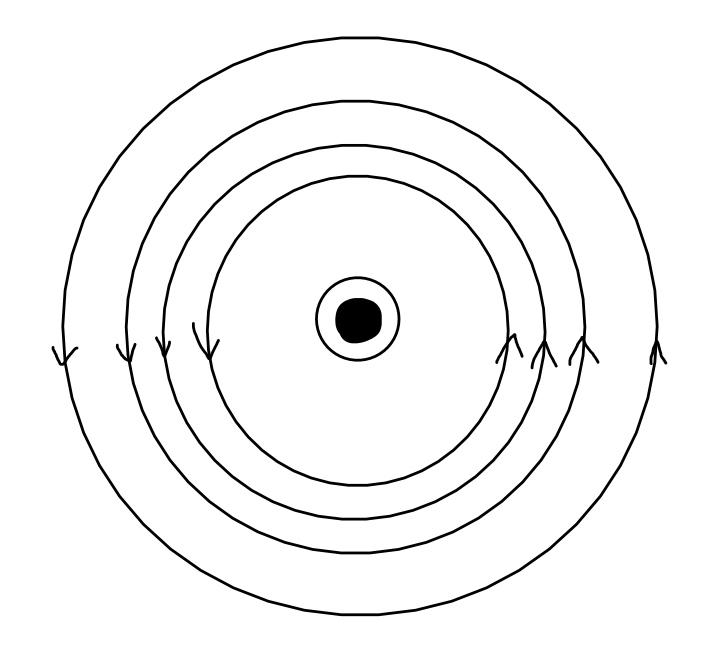
The arrows show that the currents are flowing clockwise or anti-clockwise, also representing the direction of the currents.
The direction of the magnetic field of a current-carrying wire is reversed when the direction of the current is reversed.
and about magnitude
The strength of the magnetic field of a current-carrying wire increases when the current is increased
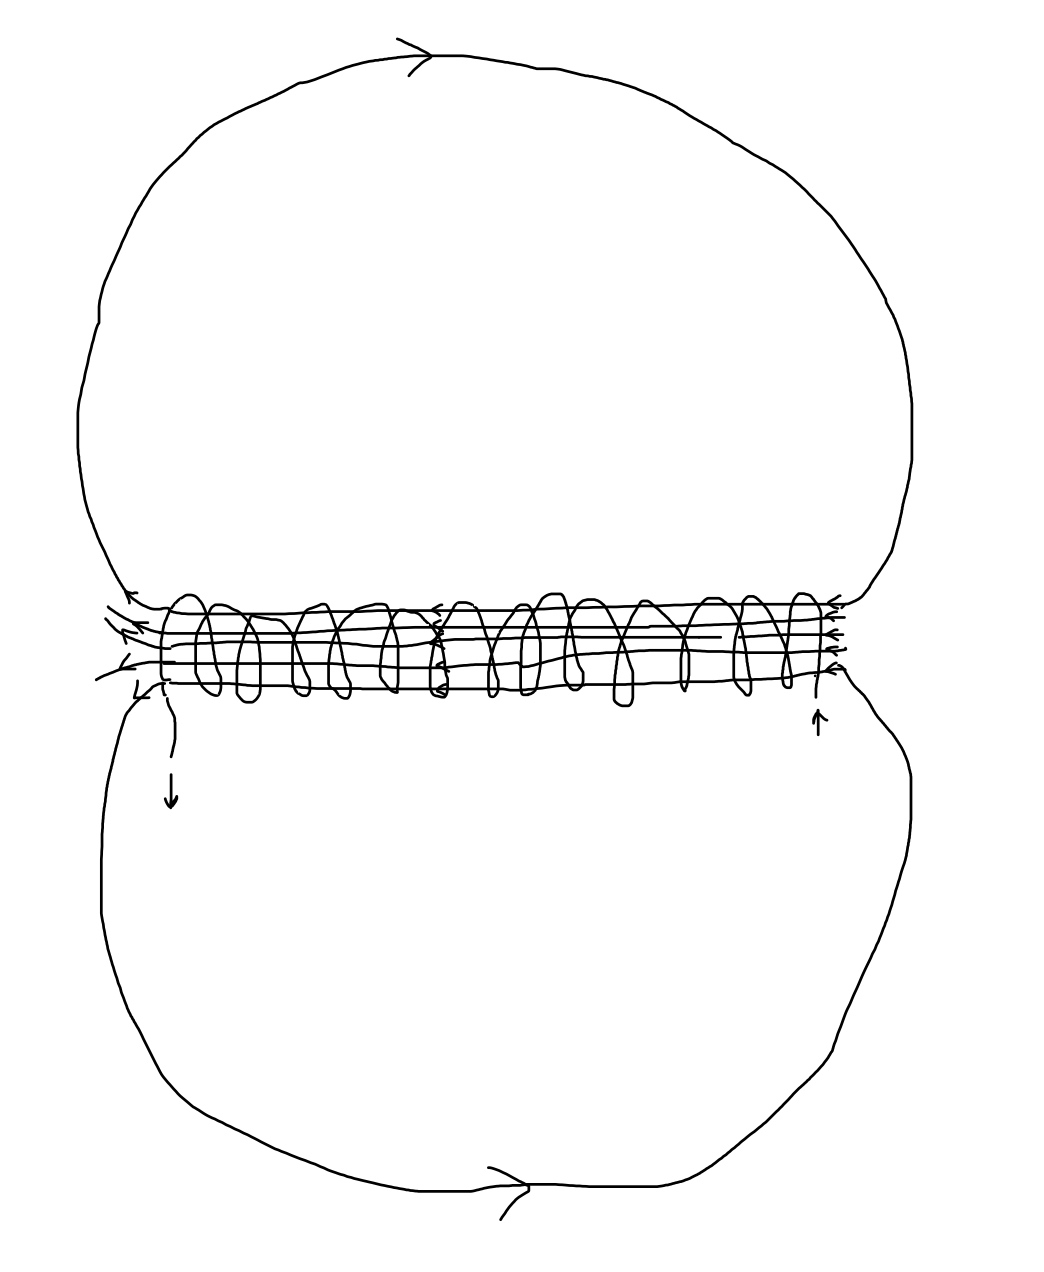
Magnetic field pattern of a solenoid
The magnetic field lines inside the solenoid are closer together than the field lines outside, meaning that the magnetic field inside the solenoid is stronger.
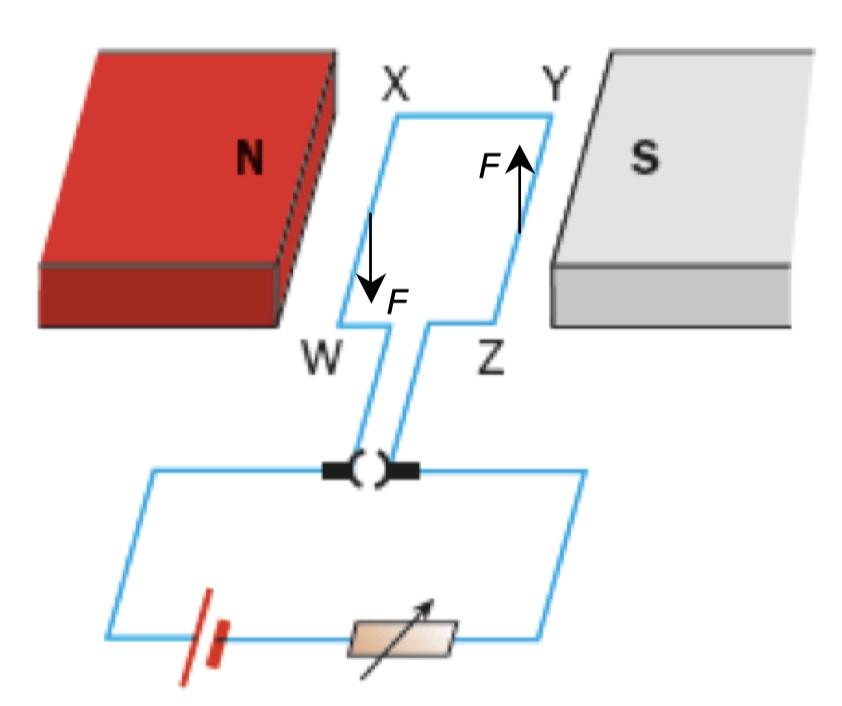
The Motor Effect
-- Force due to magnetic fields
When a current-carrying conductor is placed in a magnetic field, the conductor experiences a force. This effect on the conductor is called the motor effect.
The direction of the force on a current-carrying conductor is reversed when we reverse the direction of the current or magnetic field
The force, current and magnetic field are at right angles to one another
Turning Effect on a Current-carrying Coil in a Magnetic Field
The turning effect on a current-carrying wire coil can be increased by the increasing the
- number of turns in the wire coil
- current in the wire coil
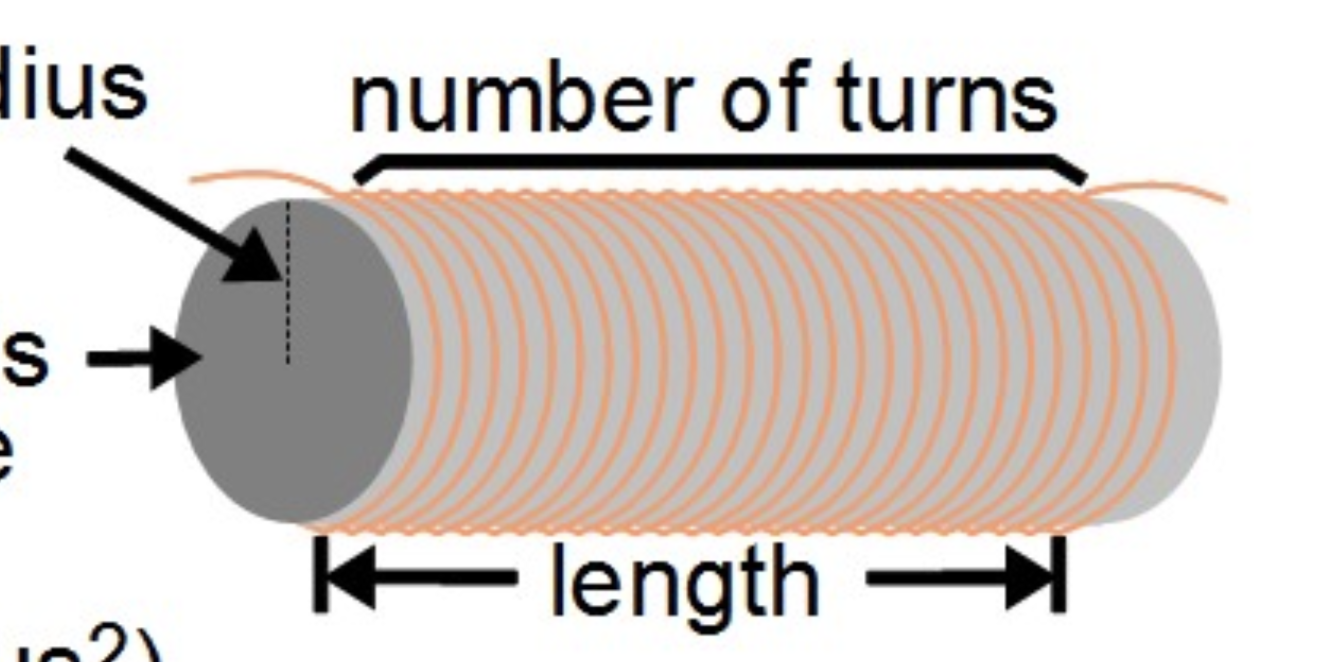
Above: the number of turns
Let's Review Exercise
Section A
- B
- A
- D
- B
- C (Notice that the direction of the electron beam is opposite to the direction of the current)
- C
Section B
1.
(a) (i)

The magnetic field lines form concentric circles around the long straight wire, these concentric circles are closer to one another when they get closer to the wire.
(ii)
The pattern of the electromagnetic field lines are very similar to the ones of a bar magnet.
(b) The magnitude of the current passing through the conductor affects the strength of the magnetic field of the current-carrying conductor. Decreasing the magnitude of the current decreases the magnetic field of the current-carrying conductor.
(c) The direction of the current affects the direction of the magnetic field of the current-carrying conductor. Reversing the direction of the current reverses the direction of the magnetic field of the current-carrying conductor.
Section C
1.
(a) The Fleming's left-hand rule is used to determine any one of the direction of the current, the magnetic field and the force given the direction of the other two.
(b) (i) (ii)
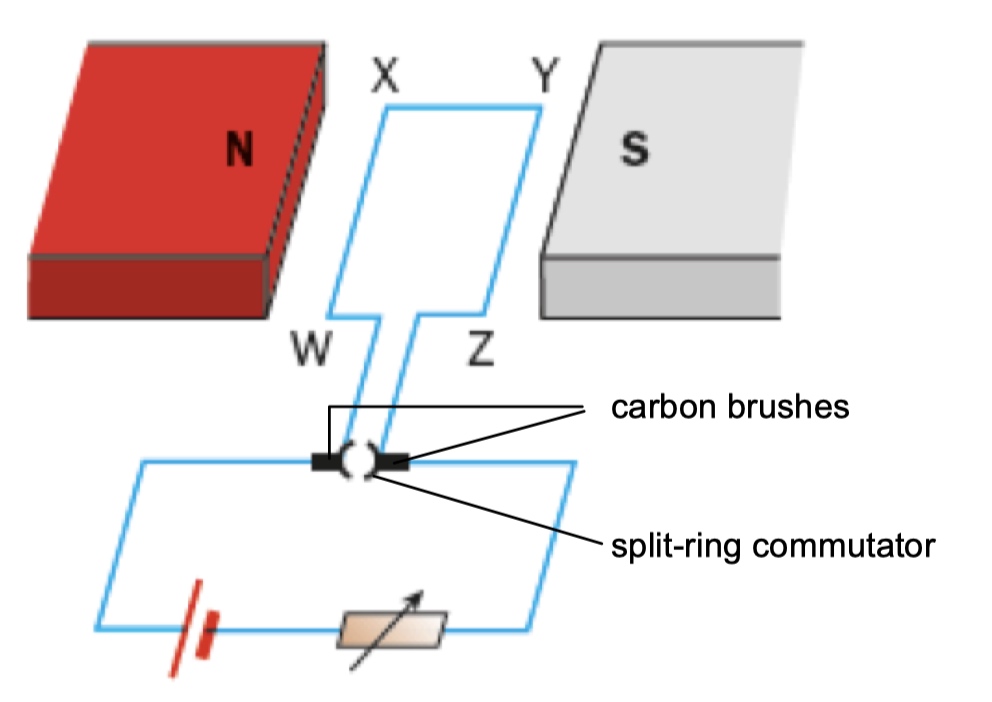
(c) Split-ring commutator reverse the direction of current in the motor every half-revolution to keep the coil turning in the same direction. The Carbon brushes press lightly against the commutator and conduct current to the rotating coil through the commutator.
(d) It will rotate anti-clockwise.
(e) By changing the direction of the current
*2.
(a)
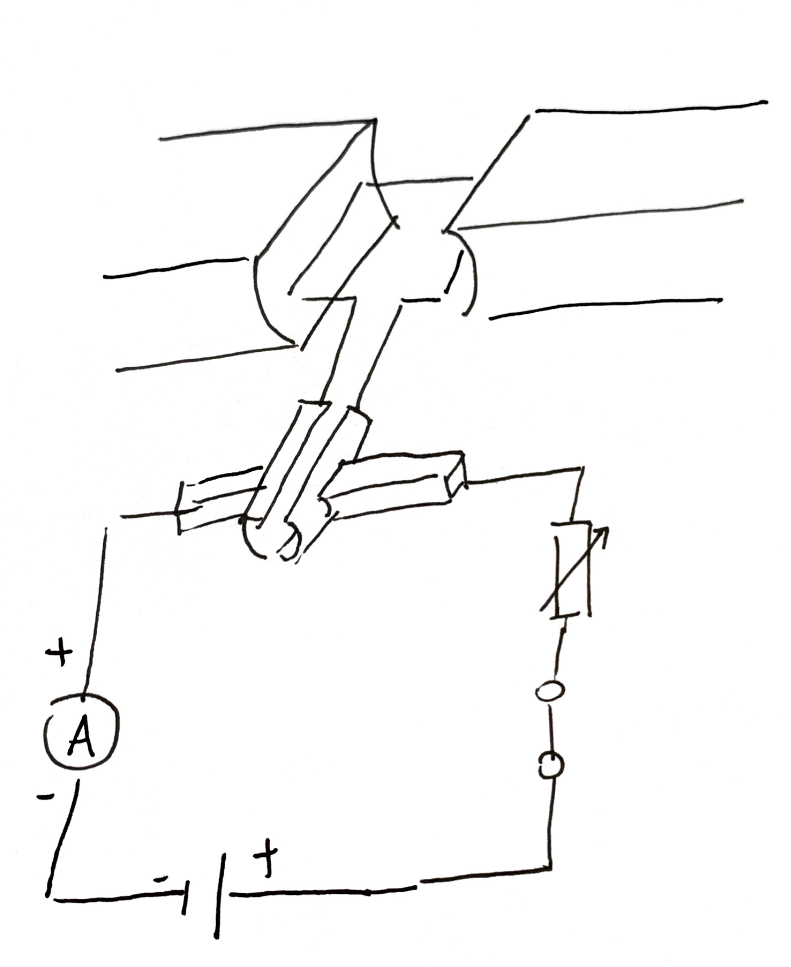
(c) (i) Set the rheostat to the highest resistance so that the initial current of the motor will be the smallest. This is because current is the flow of electrons. With a higher resistance, they will flow slower, resulting in a smaller current.
(ii) The rheostat allows us to control the flow of current, which then controls the force of the d.c. motor, the speed of it rotating.


